Building Your First CI/CD Pipeline on AWS
AWS CodeDeploy deploys your applications, lambda functions, and static files to AWS computing services. A continuous integration/continuous deployment (CI/CD) pipeline has four major components, and each of these components can be switched out for different technologies.
In this post, we’ll be exploring how to implement a CI/CD pipeline on AWS. For the purposes of this tutorial, we’ll go over deploying a simple Python Flask application built with docker and hosted using a GitHub code repository, a Jenkins CI service, and AWS CodeDeploy to deploy to AWS EC2.
Let’s Start Deploying
First, you need an account with AWS. If you want to experiment or try before you buy, you’ll be fine on the free plan. You’ll also need something to deploy. Your deployment could include a web application, a docker image, or maybe you need your CD to push some data to production. For our example, we’ll use a simple Flask application.
Example Application
If you don’t have anything in mind, or you would like to start with a hello world example, then you can check out this GitHub repository that has a very simple Python Flask application. You’ll need to fork it or just copy it over someplace else so you can push a change to fire off the deployment.
AWS Requirements
You need a few different components to get your CI/CD process running smoothly with AWS. We’ll assume that you are using the above Flask application example to go over these. AWS CodeDeploy is very flexible in terms of components, but you’ll need an Identity and Access Management (IAM) user with write access to an S3 bucket, CodeDeploy, and an EC2 instance. For more information, see a step-by-step guide on creating IAM users for CodeDeploy with EC2 here. As a quick note, IAM permissions can get quite complicated. Generally, it’s best practice to have a single IAM user for each operation—in this case, one to upload to S3 and another to deploy. You can always create an admin user that has access to everything, but this is insecure and obviously none of us would do such a thing.
Staying Organized
As I go through exercises like these, I like to have a spreadsheet handy where I keep my resource name, types, and Amazon Resource Names (ARNs), which we will get into in a minute. You can always access the information through the AWS management console, but it can be nice to have all the relevant information organized by the project in a spreadsheet. Ultimately with AWS, you create resources—for example, S3 buckets or EC2 instances—you have IAM users, and you have the policies and roles that sit in the middle and say who has access where.
The AWS Management Console
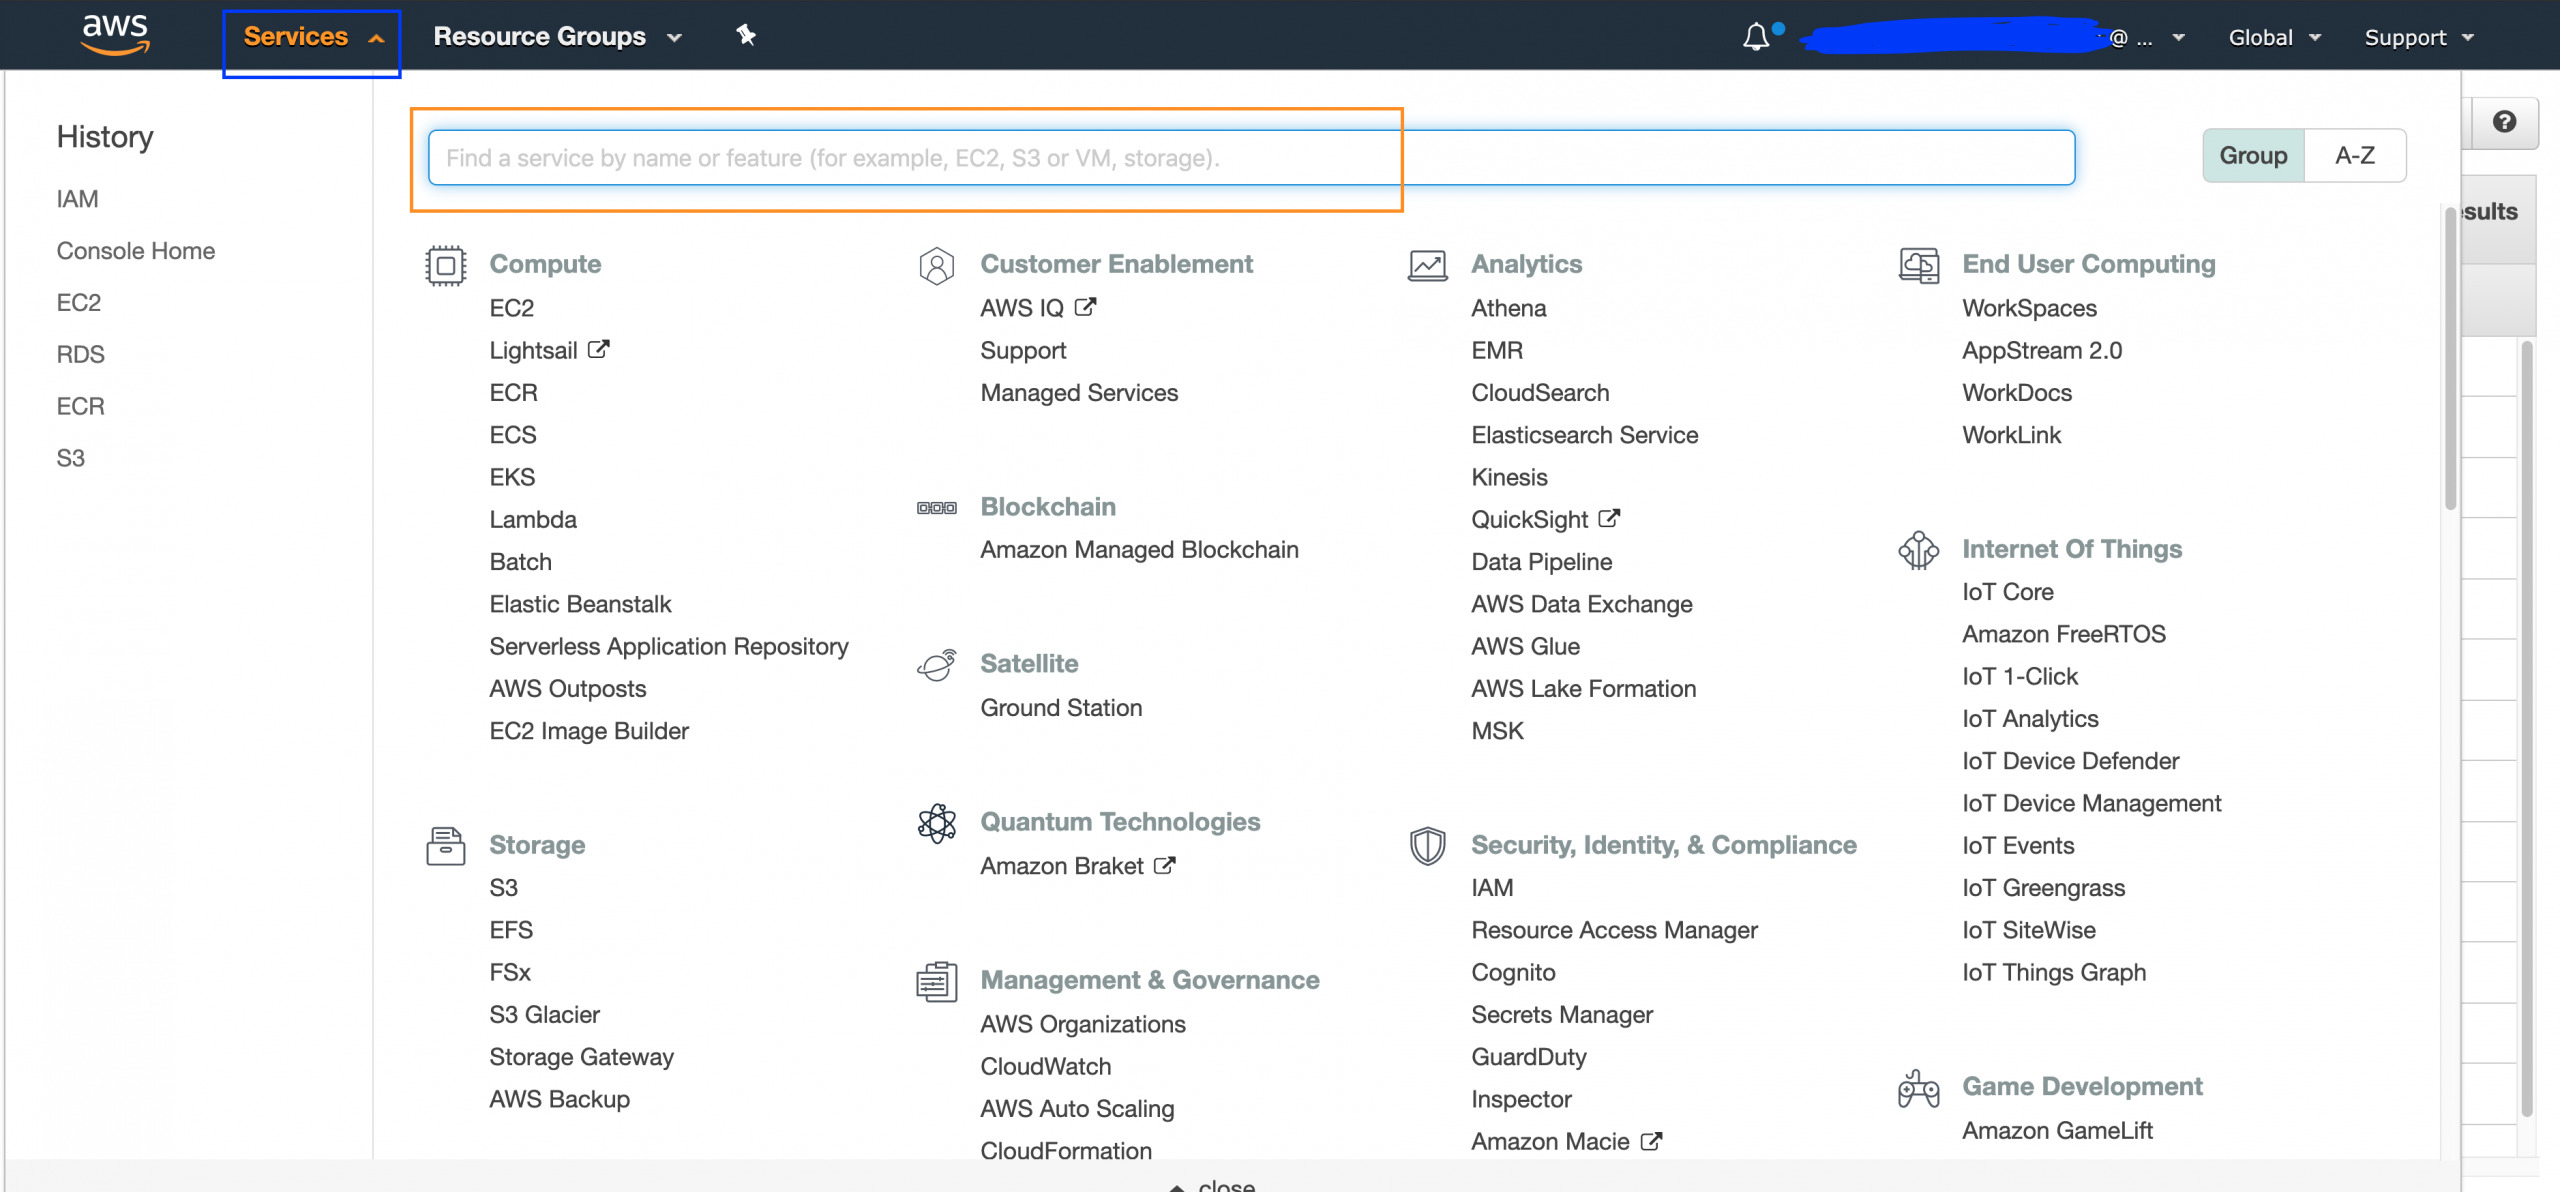
The AWS console is a busy place! It can seem overwhelming at first. My favorite trick is to simply click on the “Services” in the top left next to the AWS logo, and then start typing the service name you want to access, for example, IAM or S3. Once you get to any of these services, you’ll see a contextual menu for that service on the left-hand side of the screen.
Create an IAM User
Once in your AWS management console, click on “Services,” then in the box type “IAM.” Click on the IAM link, then on the left-hand contextual menu.
Click on the blue “Add User” button, and create a user with programmatic access. If you also want the user to be able to log in to the console, use that too. For more in-depth information, check out the AWS docs on creating an IAM user.
Make sure to record your IAM username, access key, and secret access key somewhere!
Create an S3 Bucket
Once you’ve created a user, creating an S3 bucket is fairly straightforward. In the “Services” drop-down, type “S3” and then click “Create a new bucket.” You’ll probably want to block off public access, and we’ll give our user access to it. If you’re having trouble or want to use the command-line interface (CLI), check out these docs. Take note of your bucket name, along with the bucket URL, and record it along with your IAM user access credentials because we’ll need it when we create the policy!
Create your EC2 Instance
This is my favorite part! The EC2 instance is essentially your server, except that you can do all kinds of AWS awesomeness with it like autoscaling and adding a load balancer! Follow the same steps as before: go to “Services,” type in “EC2,” and then scroll down a bit to see “Launch EC2.” Click on that, and go through the wizard. For this example, we’ll be deploying an application using Docker Compose, so you can just go along with the default AWS Linux AMI. If you’re creating a new SSH key, make sure you download and save it! Save the EC2 ID, and add it to your other information.
AWS Developer Tools
Get into the CodeDeploy console to access AWS Developer Tools so we can carry on with our next steps.
Create a CodeBuild Project
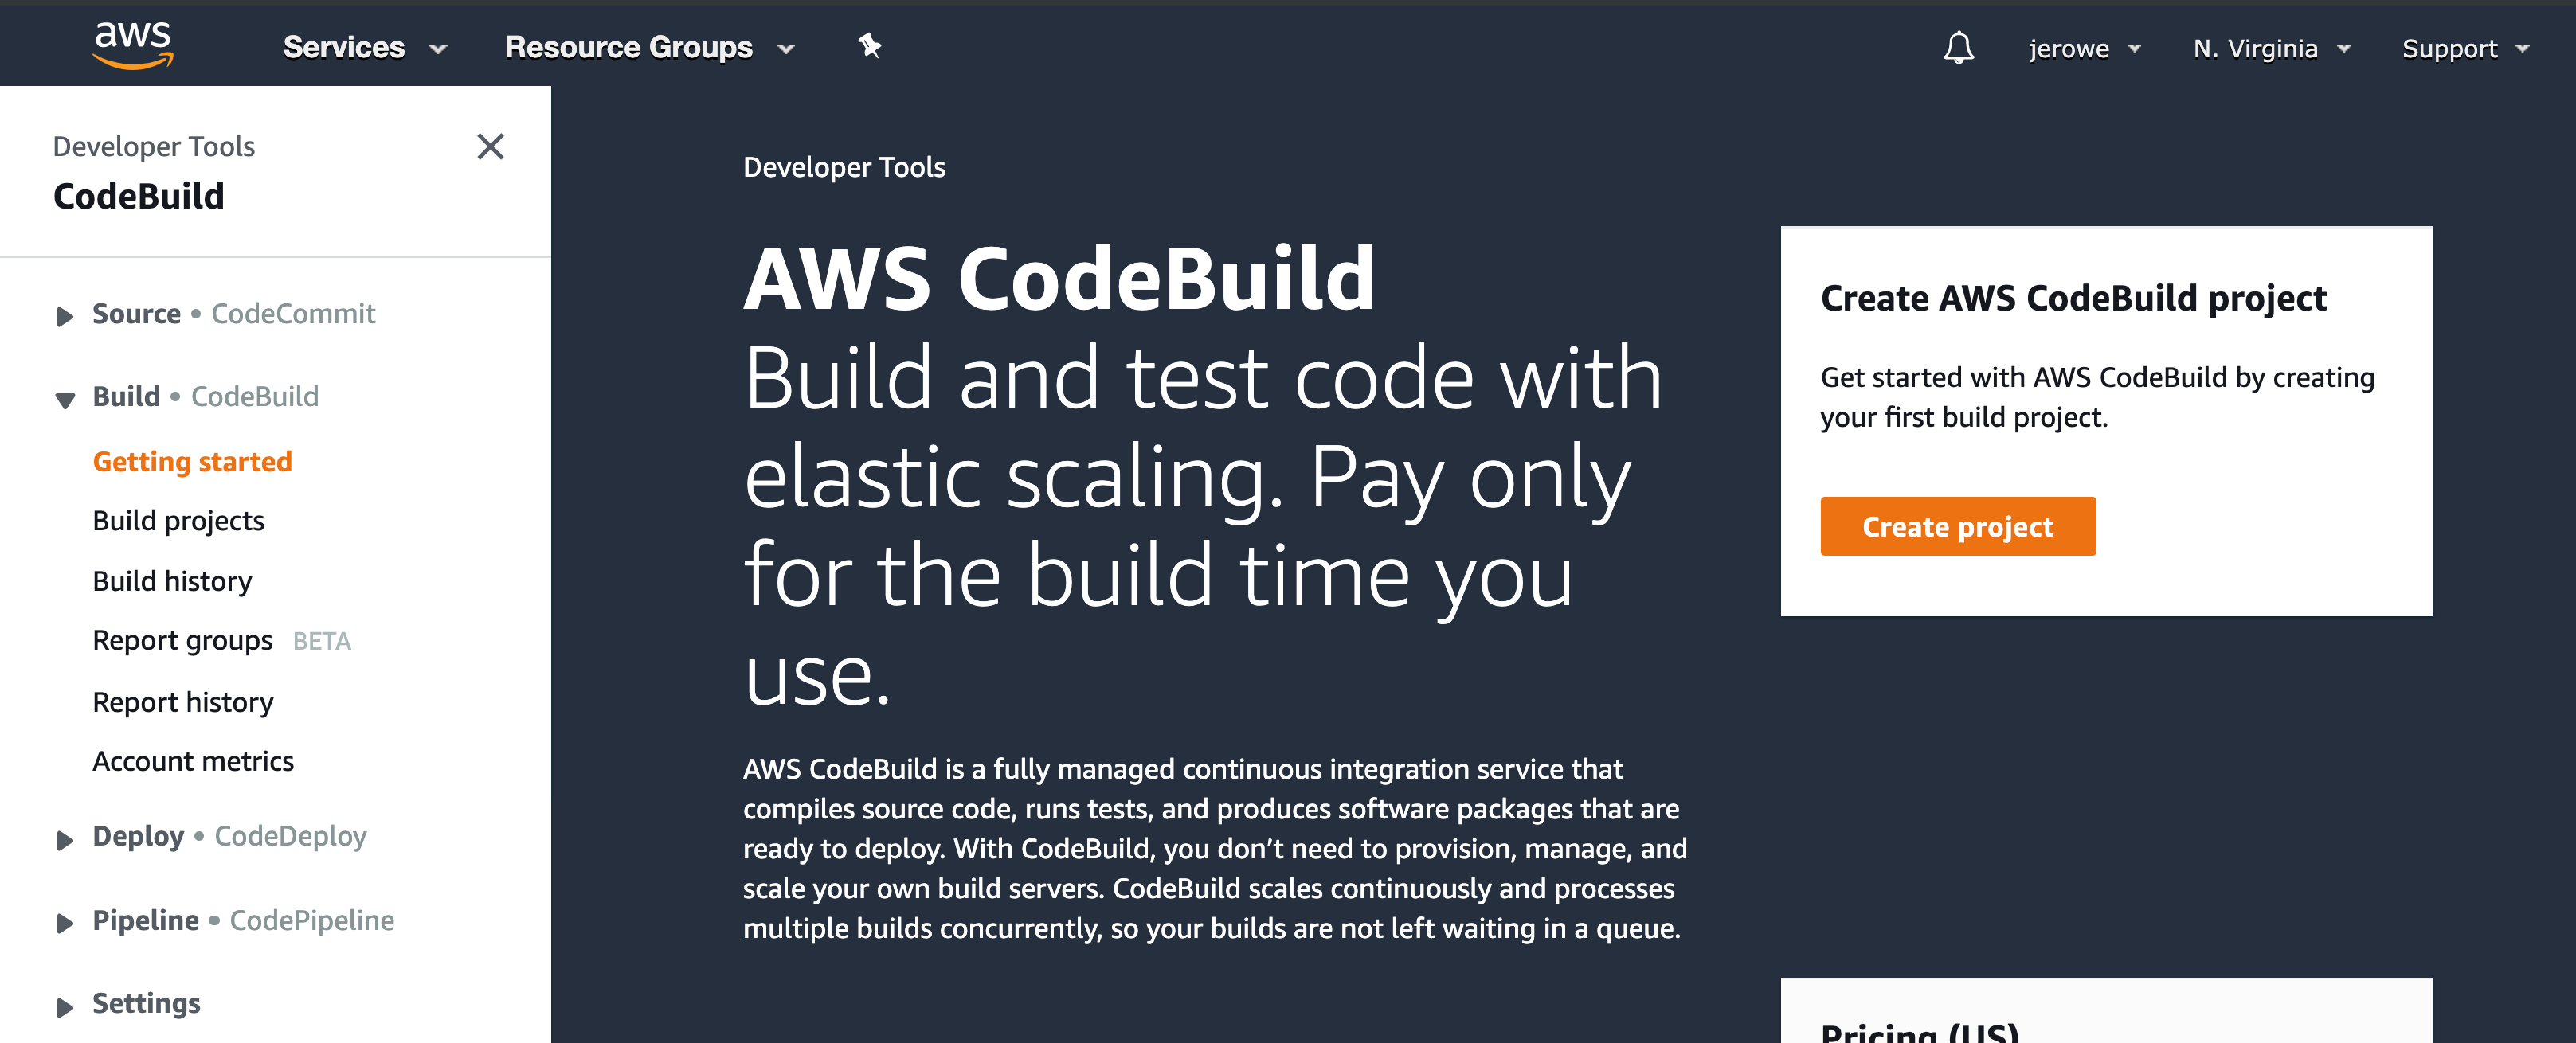
Even though we’re using Jenkins, you’ll still need a CodeBuild project on AWS. Once you’re in the AWS Developer Tools console on the left-hand contextual menu, go to “Build project,” and create a project. The wizard here is fairly self-explanatory, but we’ll go over a few important points here.
Project Configuration
Choose a name and take note of it. You’ll need it to hook it up to Jenkins.
Source
Choose no source. Of course, we do, in fact, have a source, but we’re taking care of it from the Jenkins plugin.
Environment
Choose a managed environment and Amazon Linux OS. Create a new service role, and name it something like {{ProjectName}}-ServiceRole. In keeping with our theme, make sure you record it!
Artifact
Under type, choose S3 and put in your bucket name, and create a build artifact name. If you’re following along, we’ll name it codebuild-artifact.zip. If you name it something else, make sure to record it, and when we get to the Jenkins configurations, change it to match your value. Under “Artifacts packaging” choose “None.” We’ll be taking care of that with Jenkins.
Once you have that ready to go, click the orange “Create Build Project.”
Create a CodeDeploy Configuration
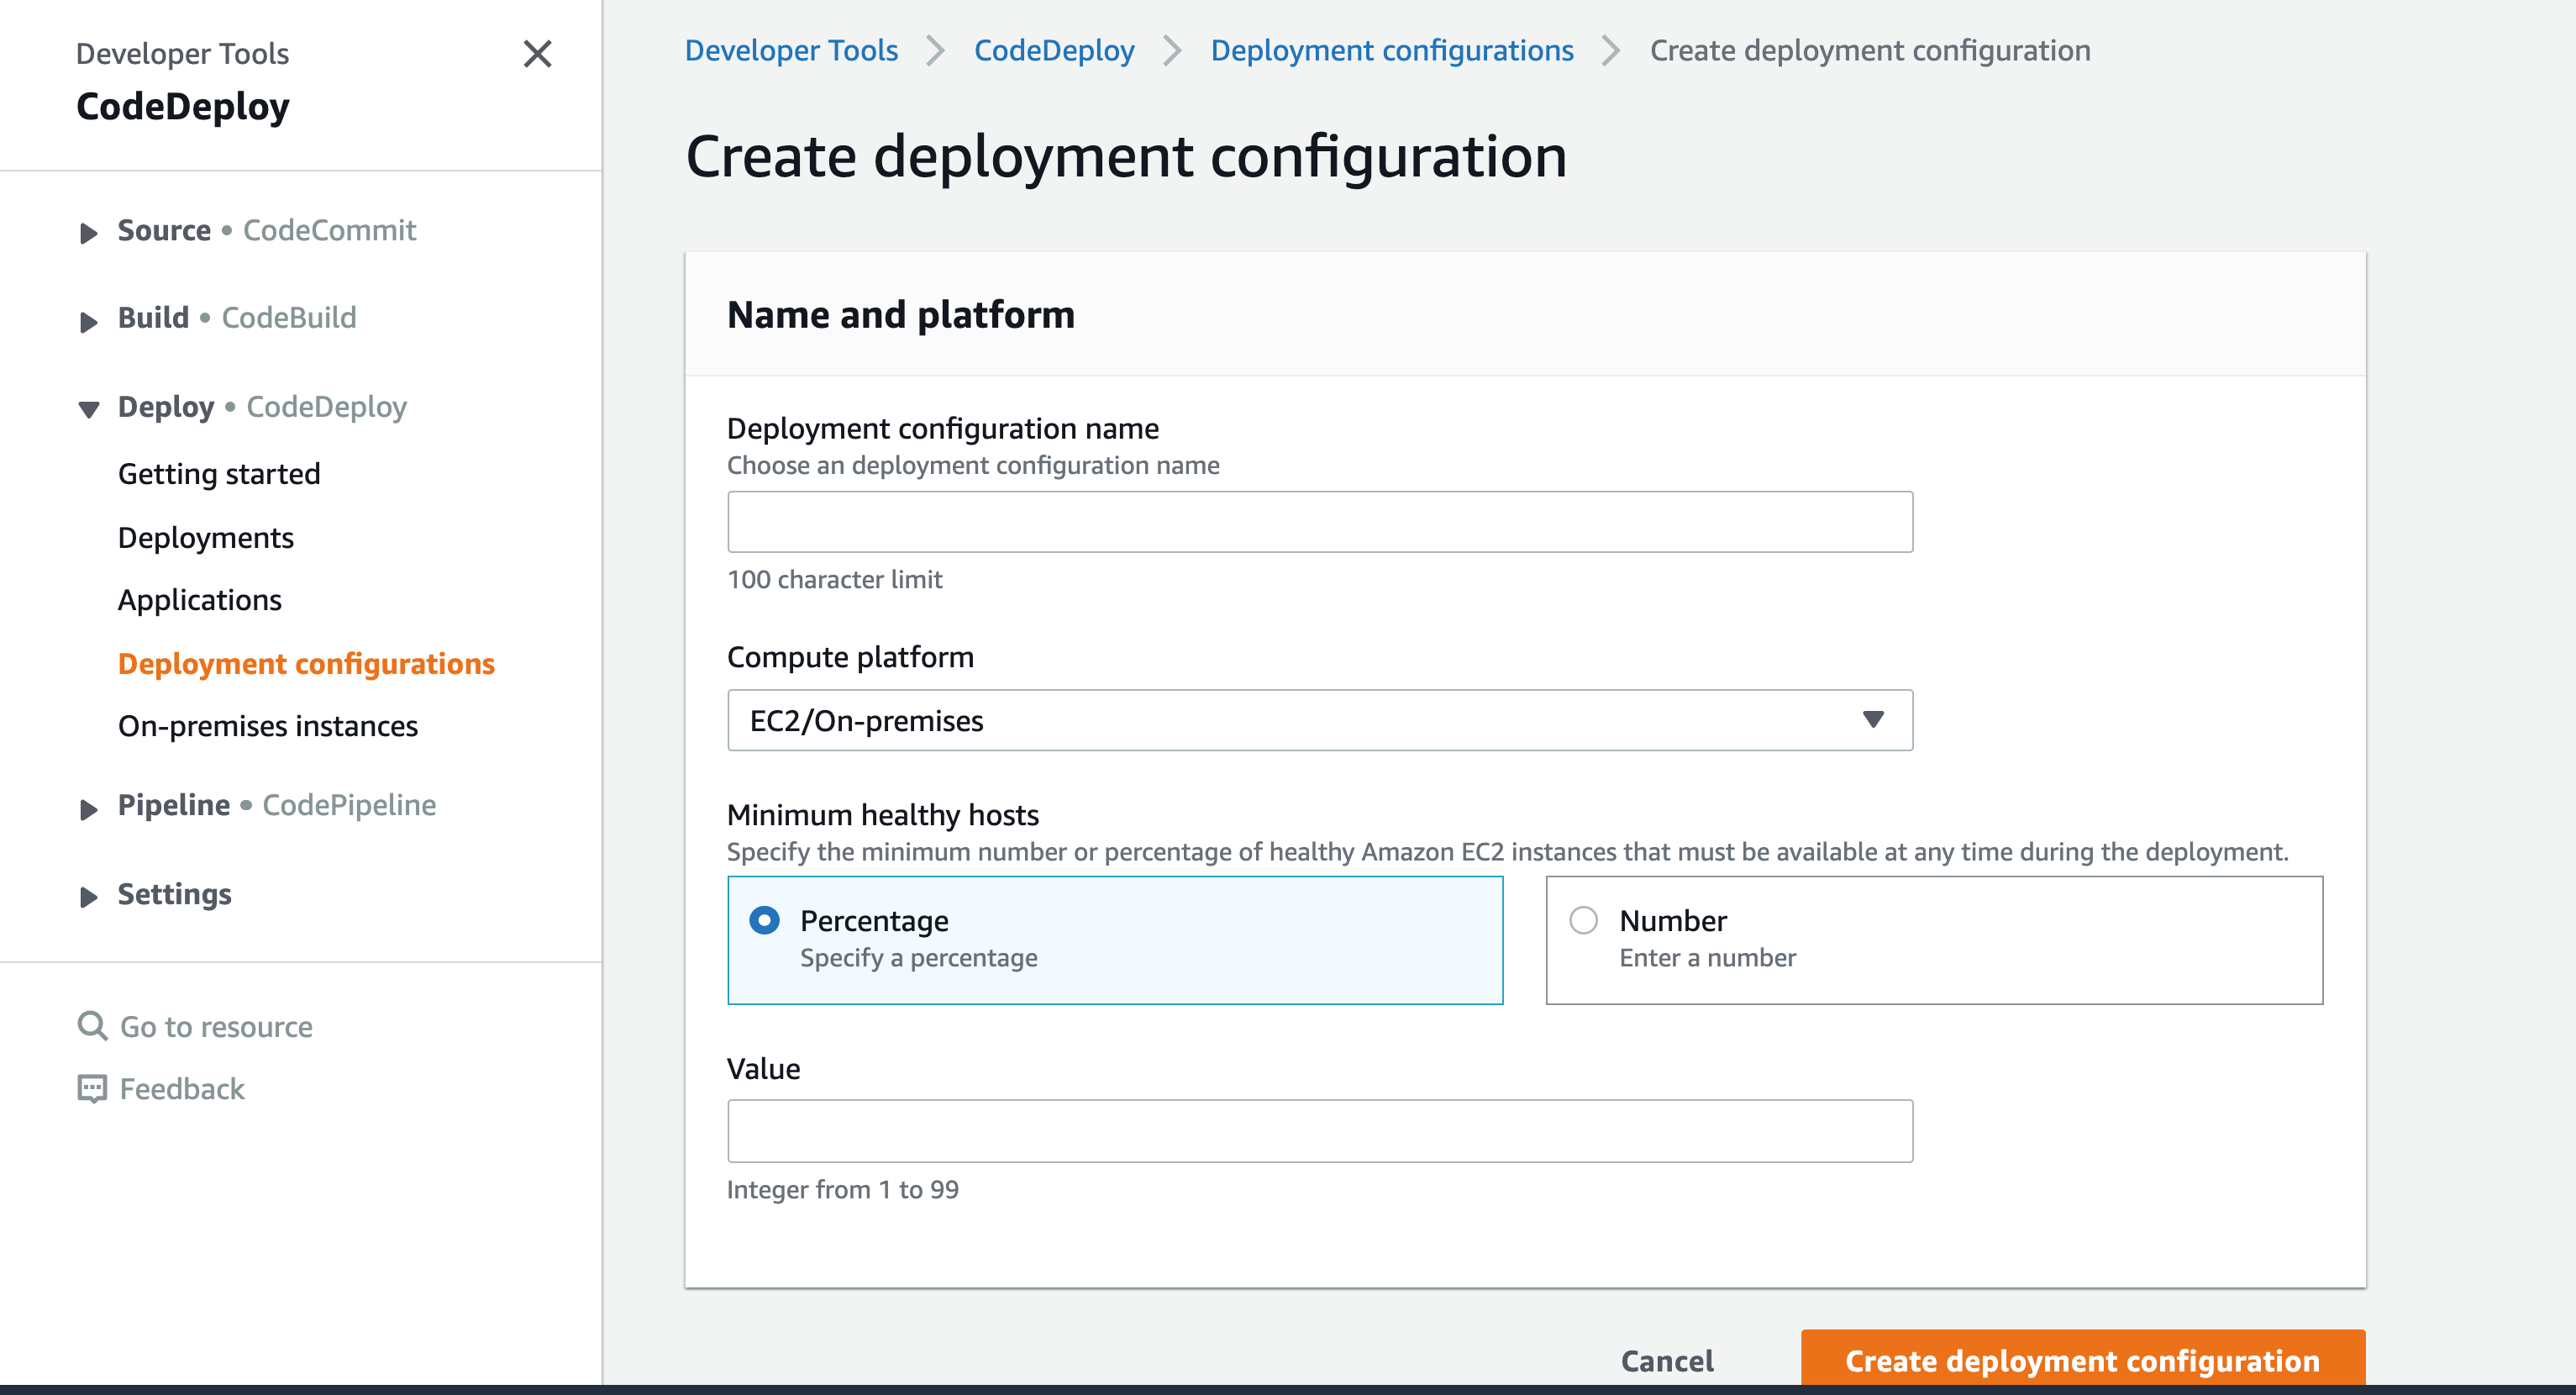
This one is easier! Under “Deploy” -> “Deployment Configurations,” create a descriptive name and choose EC2 as your “Compute Platform.”
I also suggest enabling cloud logging. It’ll make it much easier to debug difficult builds but does add to the cost!
If you ever need to debug just your CodeBuild configuration, you can run a build directly from the console. Upload a zip file to your S3 bucket and try it out!
Jenkins Requirements
In order to get started with AWS CodeDeploy and Jenkins, you’ll need to have a few plugins installed. You’ll need the File Operation plugin, the AWS CodeBuild plugin, and the HTTP Request plugin. You can download these straight from the Jenkins plugin interface.
Build Steps
Add a Build Step: AWS CodeBuild
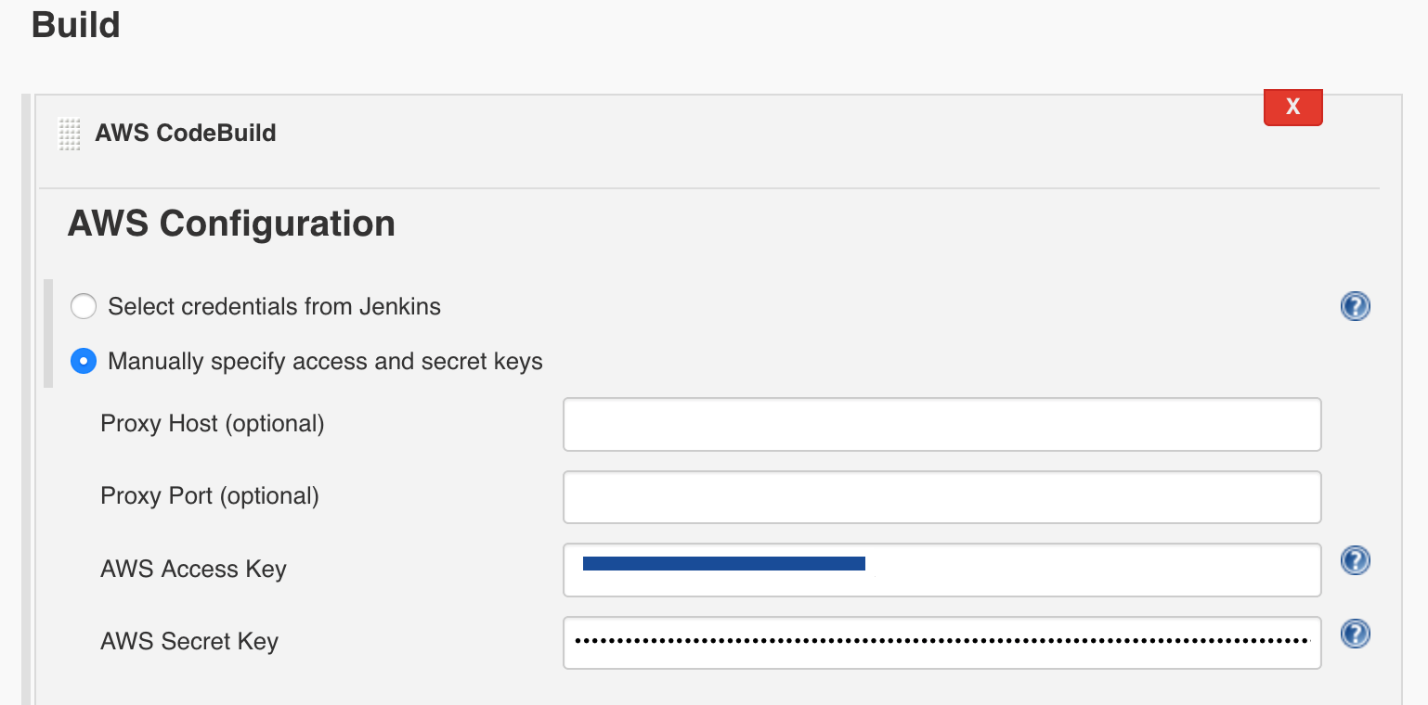
You’ll have to have a project set up in Jenkins. If you have one already, you can use that, or else you can grab this GitHub repository and set it up in Jenkins. When you’re configuring your project go to “Build Actions,” and add a “Build Step” and “AWS CodeBuild.” On the “AWS Configurations,” choose “Manually specify access and secret keys,” and provide the keys you should have from your IAM access keys.
Next up, you’ll need to enter your CodeBuild details, which are the CodeBuild project name and the region, and select the “Use Jenkins Source” radio.
Add a Build Step: File Operations
Now that that’s set, you’ll need to add another “Build Step” with the File Operations plugin. You will want to select the “File Deletion” option and type in *, meaning clean up all files. This keeps your build environment nice and tidy!
Add a Build Step: HTTP Requests
When you add your HTTP request, you’ll need the S3 bucket URL. For example, http://s3-us-east-1.amazonaws.com/my-bucket-name/ and a zip file name, codebuild-artifact.zip, or the build artifact you chose when you created your CodeBuild project. Select “Ignore any SSL errors.” Make sure you have the correct region, and your whole URL will look like this: http://s3-{{region}}.amazonaws.com/{{bucket-name}}/codebuild-artifact.zip.
Next, we’ll add to the advanced settings. For “Connection Timeout,” enter 0, “Response Codes” expected 100:399, and “output response to file” should match your zip file, in this case, codebuild-artifact.zip. Select “No” for “Response body in the console” and “Quiet all Output.”
Add a Build Step: File Operations
We’re in the home stretch here! What we want to do is an Unzip action to unzip your codebuild-artifact.zip, and then add a “File Delete” to delete your codebuild-artifact.zip.
Add a Postbuild Step
Here is where you’ll deploy your application to AWS. Select the “Deploy an application to AWS CodeDeploy” check box. Enter in the information you saved from your CodeBuild and CodeDeploy, and you’re golden.
Build and Deploy
Once you’re all set up, push a change to your GitHub repo and watch the build magic!
Getting started with the AWS console can be tricky at first, but you’ll quickly get a feel for how to set up your various resources, record all you need, and get started. Now that you know how to hook up your own Jenkins server to AWS, you can get started building out all the awesomeness that AWS provides for your CI/CD pipeline!
