Advanced Git Commands: Rewriting History
When developers use Git, they often use a combination of a graphical user interface and the command line. A GUI has a low barrier to entry, but many of us want to leverage the power that Git CLI. Once you’ve learned the basics of the Git command line, you have some powerful commands at your fingertips. And it only gets better from there. Let’s take a look at some advanced Git commands that will really leverage the power of Git.
This article assumes you know how to branch, commit, and merge. But then again, it assumes only that. The rest will be explained.
Amend
The command “git commit –amend” will allow you to add staged changes to the previous commit. This is useful if you made some new changes that logically belong to the last commit you made. Instead of adding a new commit to the log, you can add the changes to the last commit.
Let’s say you edit some file and run these Git commands:
git add README.md
git commit -m “Add installation instructions to the readme”
Now, if you forgot something and edit the README again, you could create a new commit, making your log look something like this:
acb6767e3 Add more installation instructions to the readme
554dd2e66 Add installation instructions to the readme
You could write a better commit message for the last commit, but in some cases, having a single commit is better. This is actually quite easy. After creating your first commit and editing the file again, just run this command:
git add README.md
git commit –amend –no-edit
The –amend flag will add the staged files (README.md, in our case) to the last commit. The –no-edit flag will avoid having your editor opened. If you know you want to edit the commit message, omit this flag.
Rebasing
Amending a commit is a basic way of rewriting history: you added an entry to the Git log, but with the –amend flag, you’re changing that entry. Rebasing is an even more powerful way of rewriting history. What a rebase will do is reapply a set of commits on a given branch.
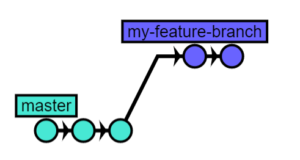
Let’s say you have a master branch with three commits (each circle represents a commit):
When you branch off this and add two commits to your branch, you get this:
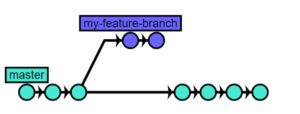
But in the meantime, development continues, and new commits have been added to master:
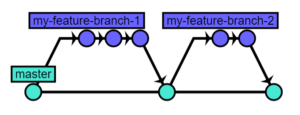
Before you merge, you might want to add the latest commits on master to your branch, just so you’re sure everything keeps working. You could merge master into your branch, but this results in complicated Git logs, especially in larger teams. The convention in the world of Git is to do a rebase.
Now, because Git is a distributed version control system, your local repository still contains the master branch without the new commits. To clarify, let’s compare the local and the remote repositories:
So first we need to get the latest version of master:
git checkout master
git pull
Now we’re in sync with the remote master. Let’s compare them again:
Next, we rebase by running:
git checkout feature/my-feature-branch
git rebase master
This will result in the following situation:
So what happened here? Well, to understand this, you need to know something about the inner workings of Git. Each Git commit points to a parent commit (i.e., the previous commit). What this means is that prior to the rebase, your branch looks like this to Git:
A rebase is done in several steps. First, Git rewinds your commits, leaving you with this situation:
Next, Git adds the missing commits on master:
Finally, your branch commits are applied:
Now it’s like you’ve only just recently branched and added the commits to the most up-to-date version of the master branch. This will make a subsequent merge easier and your Git log cleaner.
If you always merge with this command,
git checkout master
git merge feature/my-feature-branch
then you’ll get a log that looks like this:
This gives a very readable Git log.
If you prefer, you can merge using fast-forward merges, by using this command:
git checkout master
git merge feature/my-feature-branch –ff-only
This will give you a Git log without separate merge commits:
So, just remember to rebase before merging:
git checkout master
git pull
git checkout feature/my-feature-branch
git rebase master
git checkout master
git merge feature/my-feature-branch
But let’s take it a step further. Let’s look at interactive rebasing to really rewrite history.
Interactive Rebasing
Remember how I mentioned Git will reapply your commits when you rebase? With interactive rebasing, you can change the way Git applies your commits. Let’s look at an interactive rebase in action.
Once again, we’ll start from this situation in our local repository:
Now let’s rebase interactively:
git rebase -i master
This will open an editor—in my case, Vim:
Here you see the list of commits that Git will reapply on the master branch. The second column gives you the SHA of the commit. The third column shows the commit message you entered. But it’s the first column that’s most interesting. Beneath these lines is a list of commands that you can use in this first column. These commands allow you to interact with the rebase.
In the above example, you can see we’ve added a Twitter connector, had some problems, made the layout look good, and finally removed an image. A better log could exist of only two commits: adding the connector and providing the layout. Let’s assume the last commit was an error and the image shouldn’t have been removed.
To do this, we can edit the lines to look like this:
Let’s run over the changes.
We haven’t changed the first line, which means Git will just apply the commit as is.
We’ve edited the second and third line to “squash” into the previous commit. This means Git will do the same, like our “git commit –amend” command, and the first three commits will be squashed into one commit.
The fourth line is preceded by an “r,” meaning we want to reword the commit message. You can see there’s a spelling error in the commit message. With interactive rebase, we can tell Git we want to change the commit message.
In the last line, we tell Git that we want to drop that commit. When rebasing, Git will not apply that commit.
When we save this file and close our editor, Git will start the rebase. A new editor will open because we need to tell Git what the commit message is for the squashed commit and for the reworded commit.
After Git finishes, we can check the logs (git log –oneline) and see our new history:
You can see that our master is at commit 10b8889 and our branch now contains two commits.
A Word of Caution
We’ve seen how Git allows you to change history after the fact. Once you start applying these techniques, you’ll realize how powerful Git is. Be warned that this comes with some responsibility. Rewriting history can severely hinder your team members, as they’ll find their repository and its branches out of sync. Getting that synchronized again is another topic but requires some effort and knowledge. This is why Git won’t allow you to push an already-pushed branch whose history you have changed unless you specifically specify the “–force” flag.
But even with that flag, you should take care not to mess up your colleagues’ work. One rule of thumb that goes a long way is to never rewrite the history of the master branch. That way, everyone can always get the latest version of the master branch and rebase their feature branch on that.
Learn about Advanced Git Commands – Cherry Picking.
Want to learn best practices for Git and Github for both teams and enterprises? Check out our Git & GitHub Boot Camp.


